

For clothing brands, screen printing quality control is not only a final inspection step. It starts when the artwork is reviewed, continues through sample approval, and stays active during bulk production, curing, washing, finishing and packing.
A screen printed T-shirt or hoodie can look correct in a photo but still fail in production if the print position shifts, the color is not stable, the ink is under-cured, the edges are blurry or the bulk order does not match the approved sample. That is why brands should understand what a real screen printing QC process should check.

This guide gives a practical screen printing quality control checklist for custom T-shirts, custom hoodies, sweatshirts, shorts and streetwear sets. Use it when reviewing samples, approving bulk production or communicating with your apparel manufacturer.
Quick Screen Printing QC Checklist
Before shipping bulk screen printed apparel, check these points against the approved sample and production requirements.
| QC Point | What to Check |
| Artwork | Correct file, clean edges, approved color separation and no missing details. |
| Print size | Width and height match the approved sample or tech pack. |
| Print placement | Position is consistent across sizes, panels and colorways. |
| Color | Print color matches Pantone, approved sample or agreed reference. |
| Opacity | Ink coverage is strong enough, especially on dark garments. |
| Registration | Multi-color artwork is aligned without obvious shifting. |
| Edge clarity | Lines, letters and small details are clean, not blurred or broken. |
| Curing | Ink is properly cured and does not crack, peel or feel sticky. |
| Fabric condition | No stains, scorch marks, pressure marks or contamination. |
| Wash testing | Print remains stable after the required wash or rub test. |
| Packing | Defective pieces are removed before folding, tagging and packing. |
1. Start QC Before the First Print

Many screen printing problems come from unclear preparation. Before the factory prints the sample, the team should confirm the screen printing artwork requirements, final print size, garment color, fabric type, print placement and color references.
This early check prevents basic mistakes such as printing the wrong file, using the wrong logo version, placing a graphic too high on the chest or preparing the wrong color count. It also helps the factory decide whether the design is suitable for screen printing or whether another method such as DTF or DTG should be considered.
If the fabric choice is still open, confirm it before final print approval because cotton jersey, fleece, rib and washed fabric can all affect ink coverage, hand feel and curing.
Before sample printing, confirm:
- final artwork file
- print width and height
- number of colors
- Pantone or color reference
- garment type and fabric
- front, back, sleeve, leg or chest placement
- whether the design crosses seams, pockets or rib areas
- whether the print needs a special effect such as puff, crack or high-density ink
Good QC starts with reducing assumptions.
2. Check the Approved Sample Carefully
The approved sample is the production reference. If the sample is not reviewed carefully, bulk production will repeat the same problem at a larger scale.
When checking a screen printed sample, review it in good lighting and compare it with the mockup or tech pack. Do not approve only because the general look is close. Check the size, position, color, opacity, edge quality, hand feel and garment condition.
A sample review checklist should include:
- correct garment style and fabric
- correct artwork version
- print size matches the request
- placement matches the mockup
- color matches the approved reference
- print is not too thick or too rough
- small text and edges are readable
- ink is not sticky after curing
- no obvious stain, scorch mark or pressure mark
For large orders, keep one approved sample at the factory and one with the brand if possible. This gives both sides the same reference during bulk production.
3. Inspect Print Placement Across Sizes

Print placement can shift when the same artwork is applied to different sizes. A large back print on a small T-shirt may look different from the same print on an oversized hoodie. Sleeve prints, leg prints and pocket-area prints can also be more difficult to keep consistent.
For production, the factory should define measurement points. For example, the print may be centered on the garment, placed a certain distance below the neckline, or aligned with a side seam or panel line. These rules should be recorded before bulk printing.
Placement QC should check:
- center alignment
- distance from neckline or waistband
- distance from side seams
- front and back balance
- left and right sleeve consistency
- print angle on panels
- placement changes across sizes
For custom streetwear, placement is part of the design. A slightly shifted graphic can change the whole look of the product.
4. Check Color Consistency and Opacity
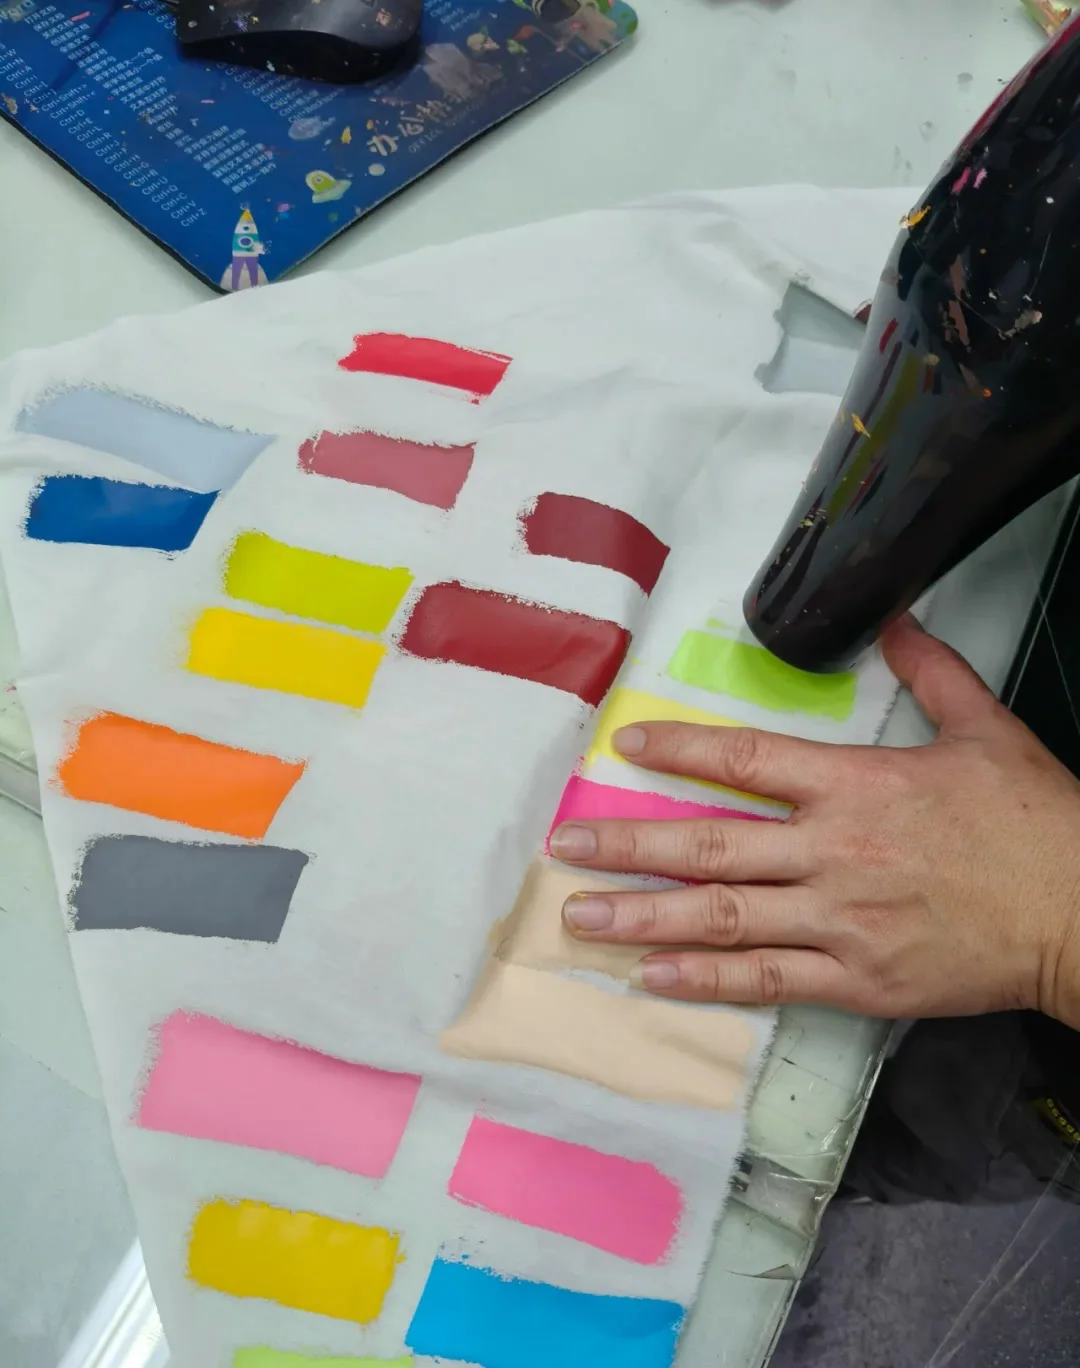
Color is one of the most visible QC issues in screen printing. The same ink can look different on white fabric, black fabric, washed cotton, fleece or rib. Dark garments may need an underbase or stronger opacity control.
During production, the factory should compare print color with the approved sample or Pantone reference. The team should also check whether the print looks even across different garment panels.
Common color problems include:
- color too light on dark garments
- color tone different from approved sample
- uneven ink coverage
- underbase showing at the edges
- color shift after curing
- color change after washing
- inconsistent opacity between production batches
For brand collections, color consistency matters because customers may compare multiple pieces from the same drop.
5. Review Edge Clarity and Registration
Screen printing is often chosen for bold graphics, typography and clean logo work. If edges look blurry, broken or misaligned, the garment may feel cheap even when the fabric is good.
For one-color prints, check whether lines and letter edges are clean. For multi-color artwork, check registration. Registration means the different color layers are aligned correctly. If one color shifts, the print may show unwanted outlines, shadows or gaps.
QC should inspect:
- small text readability
- clean logo edges
- no ink bleeding outside the artwork
- no missing details
- no pinholes in solid print areas
- no unwanted gaps between colors
- no visible misalignment in multi-color graphics
If the artwork includes distressed or cracked effects, the factory should compare the result with the intended design, because not every broken edge is a defect.
6. Test Curing and Wash Durability
Under-cured ink is one of the biggest hidden risks in screen printing. A print can look acceptable right after production but crack, peel, fade or feel sticky after washing. Proper curing depends on ink type, fabric, garment thickness, temperature, time and production speed.
For custom apparel, curing QC may include stretch checks, rub checks and wash testing. The exact test depends on the product and print type, but the goal is simple: confirm that the ink is properly bonded to the fabric.
Watch for these warning signs:
- print feels sticky or tacky
- ink cracks too easily
- print peels at the edge
- color transfers when rubbed
- print fades after wash
- thick areas cure differently from thin areas
- heavy fleece holds heat differently from lightweight jersey
If the garment will receive washing or finishing after printing, test the real production sequence before approving bulk.
7. Check Fabric Marks and Handling Defects
Screen printing QC is not only about the graphic. The garment itself must stay clean during production. Ink tables, screens, heat, pressure and handling can create fabric marks if the process is not controlled.
Common handling defects include:
- ink stains outside the artwork
- fingerprints or dust on light garments
- heat scorch marks
- platen marks
- pressure lines
- fabric distortion
- contamination from other colors
- seam or pocket areas pressed unevenly
These defects are especially visible on white, cream, pastel and garment-dyed fabrics. For premium streetwear orders, the overall garment presentation matters as much as the print.
8. Control Bulk Production During the Run
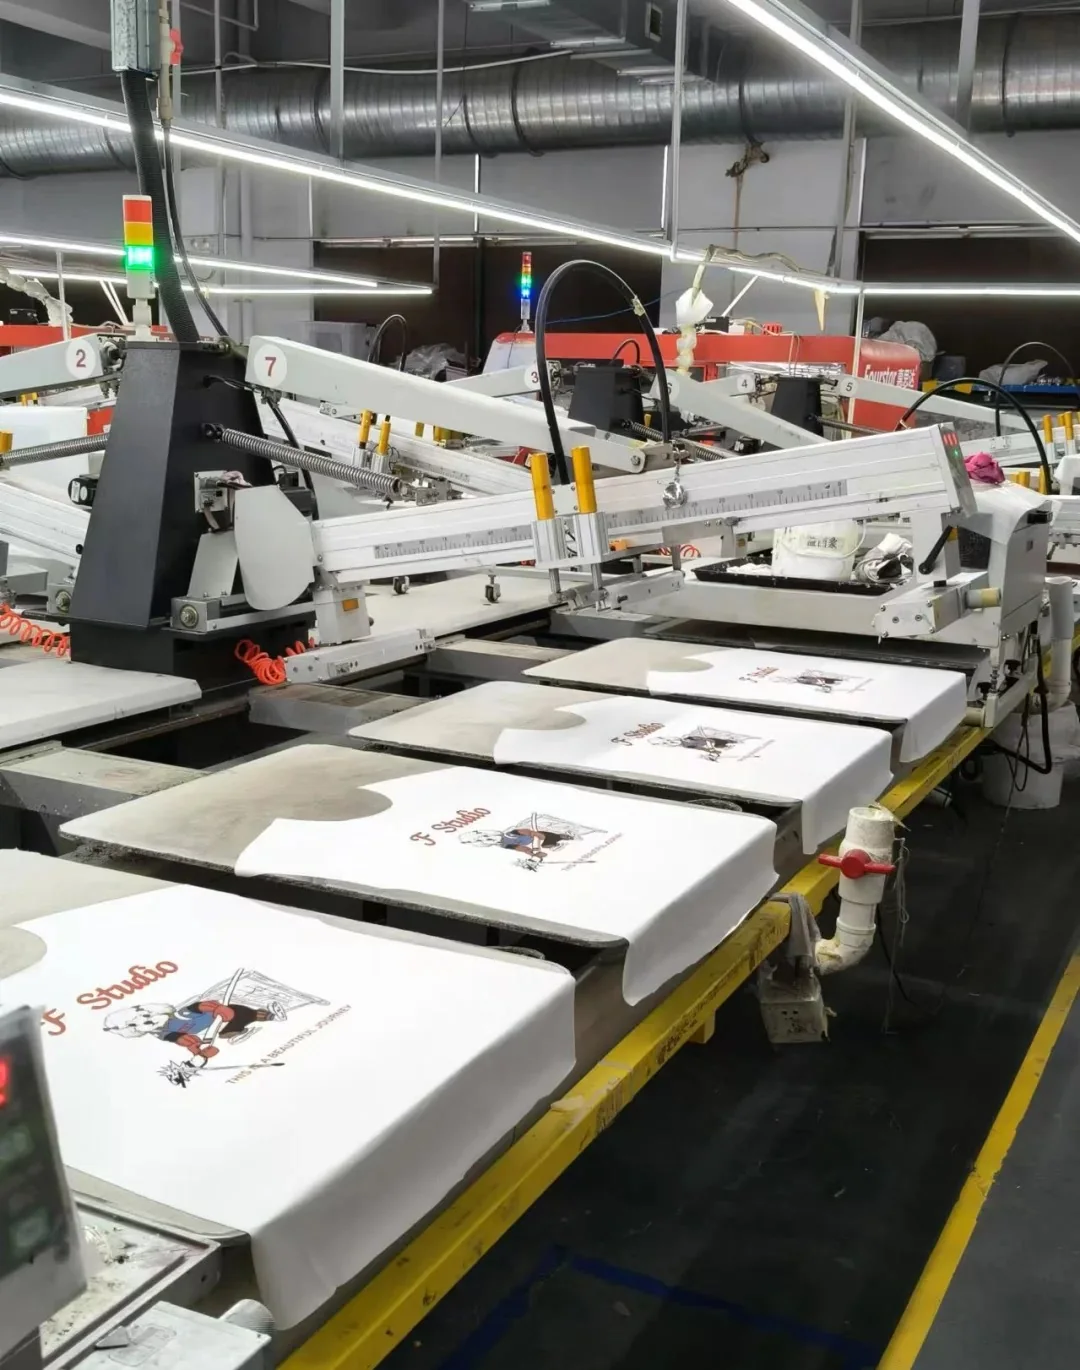
A good factory does not wait until the last garment to inspect quality. Bulk production should include in-line checks during the run. This helps catch problems early before they repeat across hundreds of pieces.
In-line QC can include checking the first pieces, checking every set number of garments, and comparing production pieces against the approved sample. If a problem appears, production should pause long enough to correct the issue.
During bulk production, check:
- first-off sample before full run
- print position at regular intervals
- color and opacity during the run
- screen condition
- ink thickness and consistency
- curing temperature and speed
- defects by size and colorway
- rejected pieces separated from good pieces
This process protects the brand from receiving a bulk order that looks different from the approved sample.
9. Final Inspection Before Packing

Final inspection should happen before folding and packing. Once garments are folded, bagged and boxed, it becomes harder to see print defects and placement issues.
The final QC team should check the screen print and the garment together. A perfect print on the wrong size, wrong color or dirty garment is still a problem.
Final inspection should include:
- print position
- print color and opacity
- edge clarity
- curing and hand feel
- garment stains or marks
- stitching and measurement basics
- label and tag placement
- size and color accuracy
- packing method
- carton quantity and shipping marks
Defective garments should be separated clearly so they do not return to the packing line.
10. Common Screen Printing Defects
Brands can communicate more clearly with a manufacturer when they know the language of common defects.
| Defect | What It Means |
| Misregistration | Multi-color layers are not aligned correctly. |
| Low opacity | Ink does not cover the garment color strongly enough. |
| Bleeding | Ink spreads beyond the artwork edge. |
| Pinholes | Tiny missing spots appear inside the print. |
| Scorch mark | Heat causes visible damage or discoloration. |
| Under-cured ink | Print may crack, peel, transfer or fail washing. |
| Placement shift | Print position is inconsistent across pieces. |
| Contamination | Dust, lint or stray ink appears on the garment. |
Not every irregular texture is a defect. Some streetwear effects, such as crack print or distressed graphics, are intentionally uneven. The key is whether the result matches the approved sample.
11. What Brands Should Send for Better QC
The factory can control quality better when the brand provides complete information. If the production team only receives a rough mockup, many details must be guessed.
For better screen printing QC, send:
- original artwork file
- tech pack or placement mockup
- final print size
- color references
- garment fabric and GSM
- sample comments
- approved sample photos
- tolerance requirements if any
- packing and label requirements
- target shipping date
This also helps the factory quote more accurately because screen printing cost is affected by print size, color count, garment type, sampling and inspection requirements.
12. When to Reject a Screen Printed Sample
Rejecting a sample is not failure. It is part of controlled product development. It is better to reject one sample than accept a bulk order with repeated problems.
You should request revision if:
- the print is in the wrong position
- color is clearly different from the approved reference
- print size is wrong
- important details are missing
- edges are blurry or broken
- print feels uncured or sticky
- hand feel is not acceptable
- wash test fails
- the garment fabric changed without approval
Clear feedback helps the factory correct the issue. Instead of saying "the print looks bad," explain whether the issue is position, color, opacity, edge clarity, hand feel or durability.
Final Thoughts
Screen printing quality control protects the brand from avoidable production problems. The best QC process checks the artwork before printing, confirms the sample before bulk, monitors the production run and inspects finished garments before packing.
If you are developing a custom apparel project, send your artwork, mockup, fabric idea, quantity and sample requirements. Eking Clothing can review the details, recommend the right print method, and help manage screen printing, sample approval, bulk production and final quality control before shipment.

